Starting July 1, 2023, Universal Analytics will no longer be collecting data and UA will be sunsetting with GA4, Google's newest analytics platform, taking its place. Below are instructions on how to migrate your Universal Analytics property to a GA4 property.
Step One: Create a new Google Analytics 4 (GA4) property
Creating GA4 Property
-
To set up your GA4 property, you must be an admin of the existing UA account.
-
Ensure you’re in the UA property you would like to use to migrate to GA4.
-
If it hasn’t been started already, click the “Manage GA4 Migration” in the prompt in the header.

-
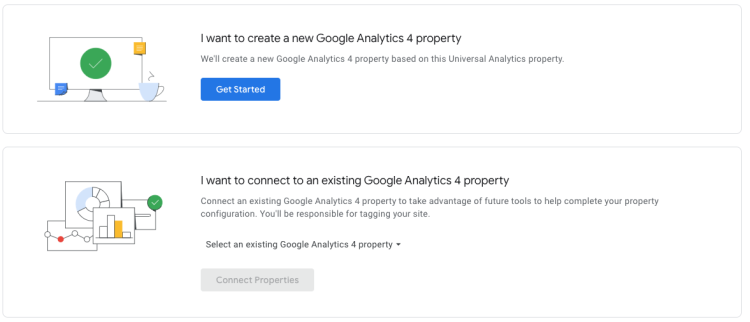
There will be two options: “I want to create a new Google Analytics 4 property” or “I wanted to connect to an existing Google Analytics 4 Property.”
-
Click “Get Started” under “I want to create a new Google Analytics 4 property.”
-
-
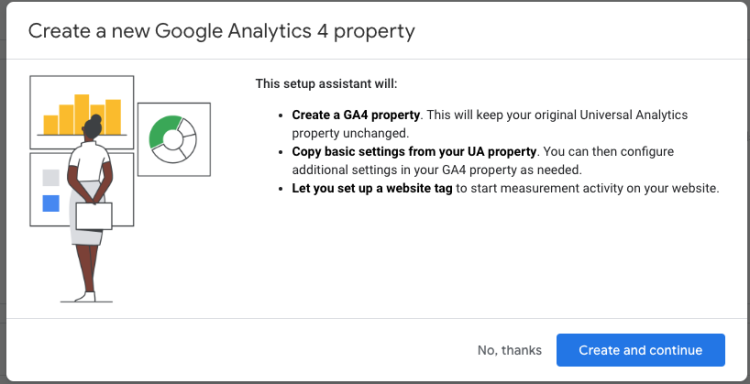
This will open a prompt screen. Click “Create and continue.”
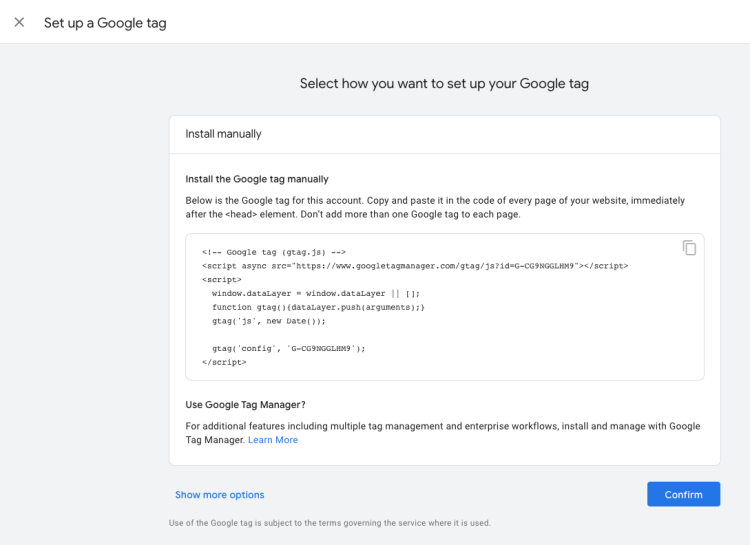
GA4 Tag
- Next there will be a screen to set up your Google tag. We can ignore this for now as SRC will place the GA4 property via Google Tag Manager.
- Click “Confirm.”
Setup Assistant
- From there, click “Go to GA4 Property” or select it from the top navigation dropdown menu under Properties.

-
This should bring you to your “Setup Assistant.” If it hasn’t, find the admin gear in the bottom left menu, ensure your GA4 property is selected, then click the top option of “Setup Assistant.”
-
Within the Setup Assistant, work through the main setup areas: “Data Collection, Property Settings, Google Ads.”
-
Data Collection
-
This will likely give a prompt that data isn’t being collected yet. This is expected as the tag is not placed.
-
Create a Data Stream if one hasn’t been created yet. Do this by clicking “Add Stream” and selecting “Web” from the dropdown menu.
-
Enter the base URL that corresponds to your department and give it a name.
-
-
Property Settings
-
It is recommended to turn on Google signals, work through and read the series of prompts, and then select “activate.”

-
Complete the rest of the settings as it fits best for your organization and marketing activities.
-
-
Google Ads
-
If you’re using Google Ads, this is an easy way to link your accounts. This is not required for all users. Some may be working with outside agencies that might have a different process.
-
-
Your base GA4 property should be ready for installation now. Use the GA4 Migration Form to submit your GA4 property to the Web Express team.
Step two: Check Your GA4 Data Settings
-
Data Privacy Settings: You should review your data privacy settings and ensure they are enabled. This can be done with the following steps:
-
Account Level Settings
-
Go to Data Sharing Settings under Account Settings:
-
Google products & services—these should be reviewed and accepted
-
Fully enable advanced data features
-
Benchmarking for Industry Category reporting
-
-
-
Go to Data Processing Terms
-
Updated Data Processing Amendment (DPA)—review and accept
-
Covers data governance related to GDPR and CCPA

-
-
-
-
-
Property Settings
-
Data Settings: This area allows you to adjust advanced settings for your account
-
We recommended enabling Enhanced measurement
-
We recommend enabling Google Signals as it upgrades existing Google Analytics properties to include more information from users who are signed in with their Google accounts.
-
-
-
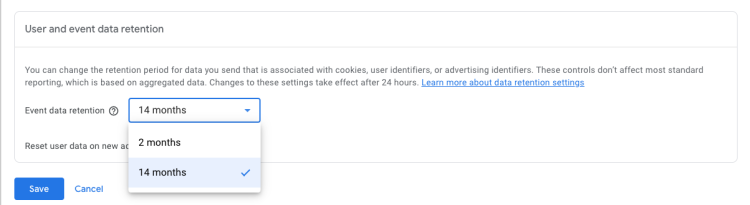
Data Retention: It will be important for you to reset how long to store your data
-
Event Data is set at 2 months out of the box, recommendation is to extend that to 14 months.

-