
To submit a reservation request for one of the B2 spaces, please use https://vems1.colorado.edu
How to use VEMS
Please login with your identikey (example)

My Home Page
The My Home page tab listing available booking locations appears
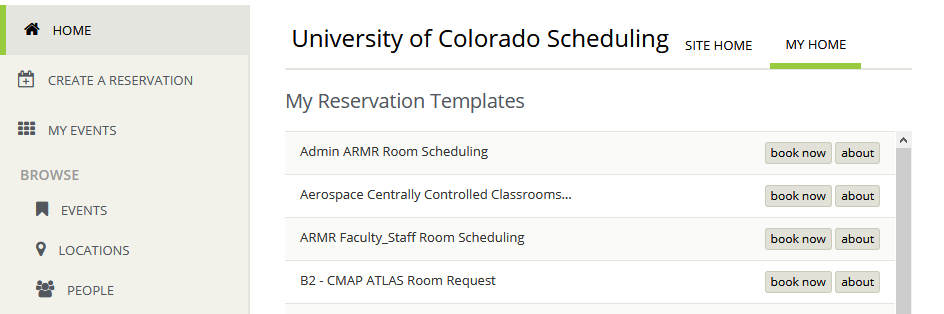
The About Button
- Information Tab – Room policies and building policies
- Booking Rules Tab – how many times, how far in advance rooms can be used.
- Book Now with this Template – starts a new search and resevation (sames as the book now button)
|
|
|


The Book Now Button
- Step 1 . Click the Book Now button to begin a reservation.
- Enter a date, start time and end time
- Click Search

- The Grid with rooms running vertically and hours across the top appears.
- Red lines indicate your time slot requested
- Greyed out areas on the grid are when the building is closed
- Purple areas on the grid are scheduled events
- Click the plus sign to add a room to the reservation
- One or more rooms can be added for a date based on what the booking rules allow

- Room alerts pop up with specific instructions for its use and the user clicks OK after review
- Selected rooms appear above the Room Search results grid

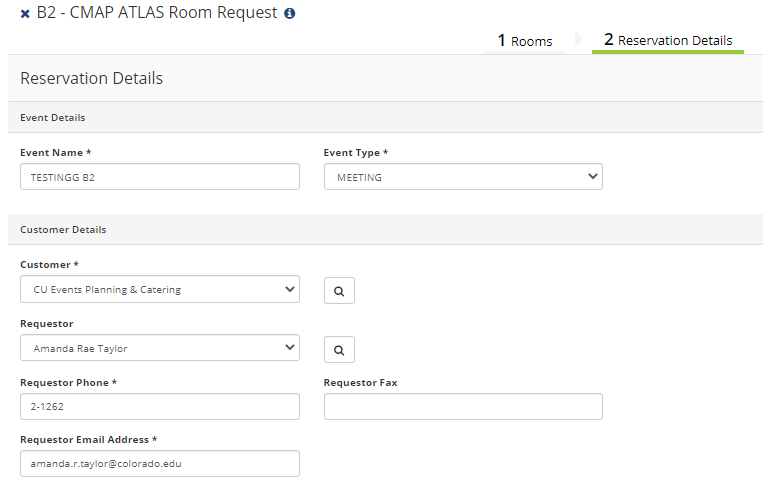
- Step 2. Click the reservation details tab or click Next Step
- Anything with a red box around it is required.
- Enter an event Name
- Click the down arrow next to customer
- Staff and Faculty choose their department, or if a student, choose STUDENT
- The requestor field appears. Student information is not automatically added due to FERPA and defaults to Temporary contact
- Student type your first and last name in the requestor field, Phone and the email address where you want confirmations of the reservation to be delivered
- Faculty staff click the down arrow next to the requestor field, select your name and your campus credentials will complete the form
- Answer the additional information questions

- Click on terms and conditions to read the facilities requirements for use and check the agree with the box

- Click Create Reservation

- The website will display Reservation Created
- You may opt to add the ICS file to any calendar
- You may opt to edit the reservation if you realize you need to adjust it
Step 3. Check your email inbox for the reservation Document indicating you have indeed submitted your request
Click the EMS ICON to go back to your Home page and make additional reservations