Title Created Resolved
Service Maintenance: WWW NG (www.colorado.edu) Tuesday, June 18, 2013 - 5:00pm Tuesday, June 18, 2013 - 8:00pm VIEW
Subscribe to Service Alerts

Static IP Configuration - Macintosh

Last Updated: 10/19/2012
This tutorial applies to the following operating system(s):
MAC

Overview

  • To request a static IP address, please go to http://hippo.colorado.edu/ipapp.
  • Static IP addresses on the CU Boulder campus must be assigned by OIT or other designated network administrators. A static IP address must be manually entered into a device, along with router address, subnet mask, DNS server addresses and domain information.
  • Instructions are for Mac OS 10.6, but work similarly for earlier versions of Mac OS X.
There is no screenshot for this step.

Step 1

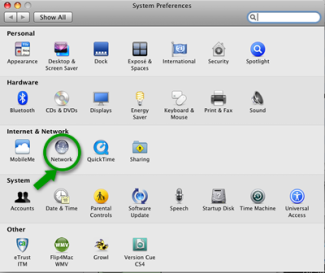
Start by opening the System Preferences by clicking on it in the dock or choosing it from the Apple menu.

Visual representation related to step 2Click image to view larger version.

Step 2

Next, select the Network, as shown to the left.

Visual representation related to step 3Click image to view larger version.

Step 3

Select Ethernet in the left column.

Visual representation related to step 4Click image to view larger version.

Step 4

Once in the Ethernet configuration, if the settings are grayed out, click the lock to make changes. You will need to authenticate with an Administrator account password. Otherwise, skip to the next step.

Visual representation related to step 5Click image to view larger version.

Step 5

Click on the Configure: drop-down menu and select Manually.

Visual representation related to step 6Click image to view larger version.

Step 6

Set the IP Address, Subnet Mask, and Router Address to the numbers provided in the OIT confirmation message you received.

Visual representation related to step 7Click image to view larger version.

Step 7

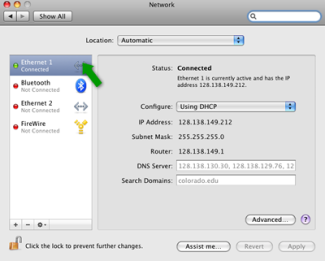
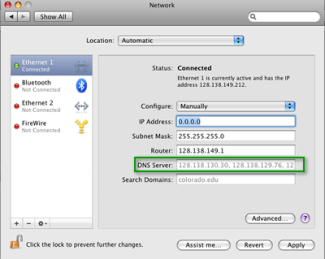
DNS Servers should be set to the three IP addresses provided in the OIT confirmation message you received. If unknown, you can look up the DNS servers for your location on campus at DNS Servers for CU-Boulder.

Visual representation related to step 8Click image to view larger version.

Step 8

Additional Search Domains should have colorado.edu as its only entry.

There is no screenshot for this step.

Step 9

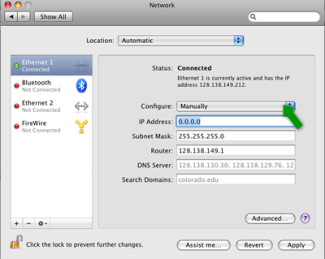
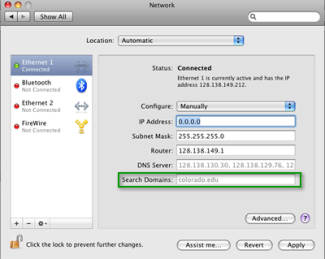
Once done, click on the Apply button and close the Network window.

There is no screenshot for this step.

Step 10

Open a web browser to test your connection. In some instances, you may be asked to register your computer onto CU-Boulder's network.

If you do not have Internet connectivity, try restarting your computer.


Related Tutorial(s)


BACK TO TOP