
Cisco VoIP - Accessing Self Care Portal and Personal Directory

The Self Care Portal can be used to manage your telephone settings, including speed dial numbers, ring settings, voicemail notifications, call history, call forwarding and phone contacts. Follow Steps 1 through 4 to access the Self Care Portal, and follow Steps 5 through 8 to manage your personal directory.

For more information, visit the Self Care Portal User Guide

OS:
Layout:
one column
two columns

Step

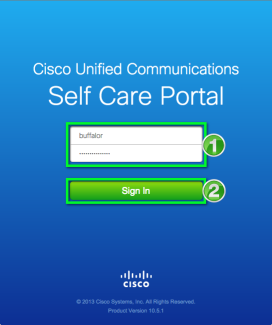
Open a web browser and go to the Cisco Self Care Portal.

Note: Please allow 1 full day for the Self Care Portal to be activated after your new Cisco VoIP phone is installed.

Step

Enter your IdentiKey username and password, then click Sign in.

Step

Once logged in you will see one or more Phone options:

  • One option will show your Phone model with your name.
  • You may see other options, such as mobility, depending on your phone configuration.

Step

To manage the settings on your desk phone, click the cog wheel on the option box that includes your name, then select Settings from the context menu.

Step

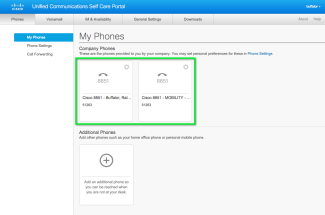
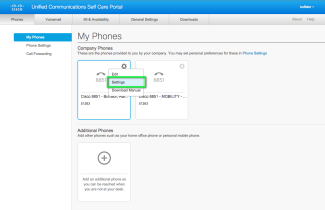
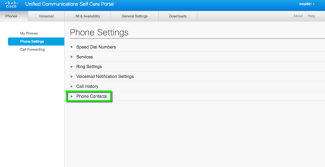
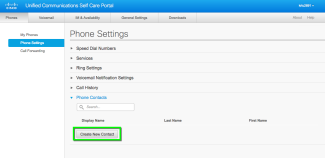
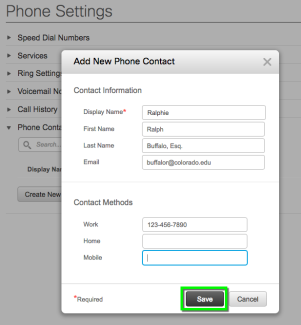
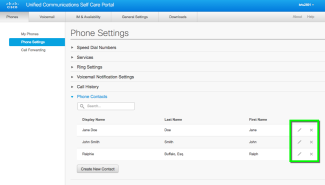
You will see options to manage your telephone settings including speed dial numbers, ring settings, voicemail notifications, call history, call forwarding, and phone contacts (Personal Address Book). Click Phone Contacts to open and manage the Personal Directory on your phone. 

*Note: If the “Phone Contacts” option does not appear, select “Phone Settings” on the left side to refresh this section

Step

This page allows you to search contacts you've already added to your VoIP phone, or create new contacts that you can search through and add to the Personal Directory on your phone. Click Create New Contact.

Step

In the New Contact pop-up window, fill in details of the contact including name, phone number and email. Click Save when finished. 

Step

The new contact will appear in your list of contacts. To the right of the new contact, there will be a few options: 

  • Pencil icon: Click to edit the contact information. 
  • X icon: Click the X to delete the contact. 

Step

On your Cisco VoIP phone, press the Contact button (book icon), and select Personal directory. Log in to Cisco Using your Identikey and the following Pre-set PIN: 123456

*Note: The Personal Directory pre-set pin is different than your Voicemail pin. 

Step

Select Personal Address Book and search through contacts you've previously added by Name or Nickname.